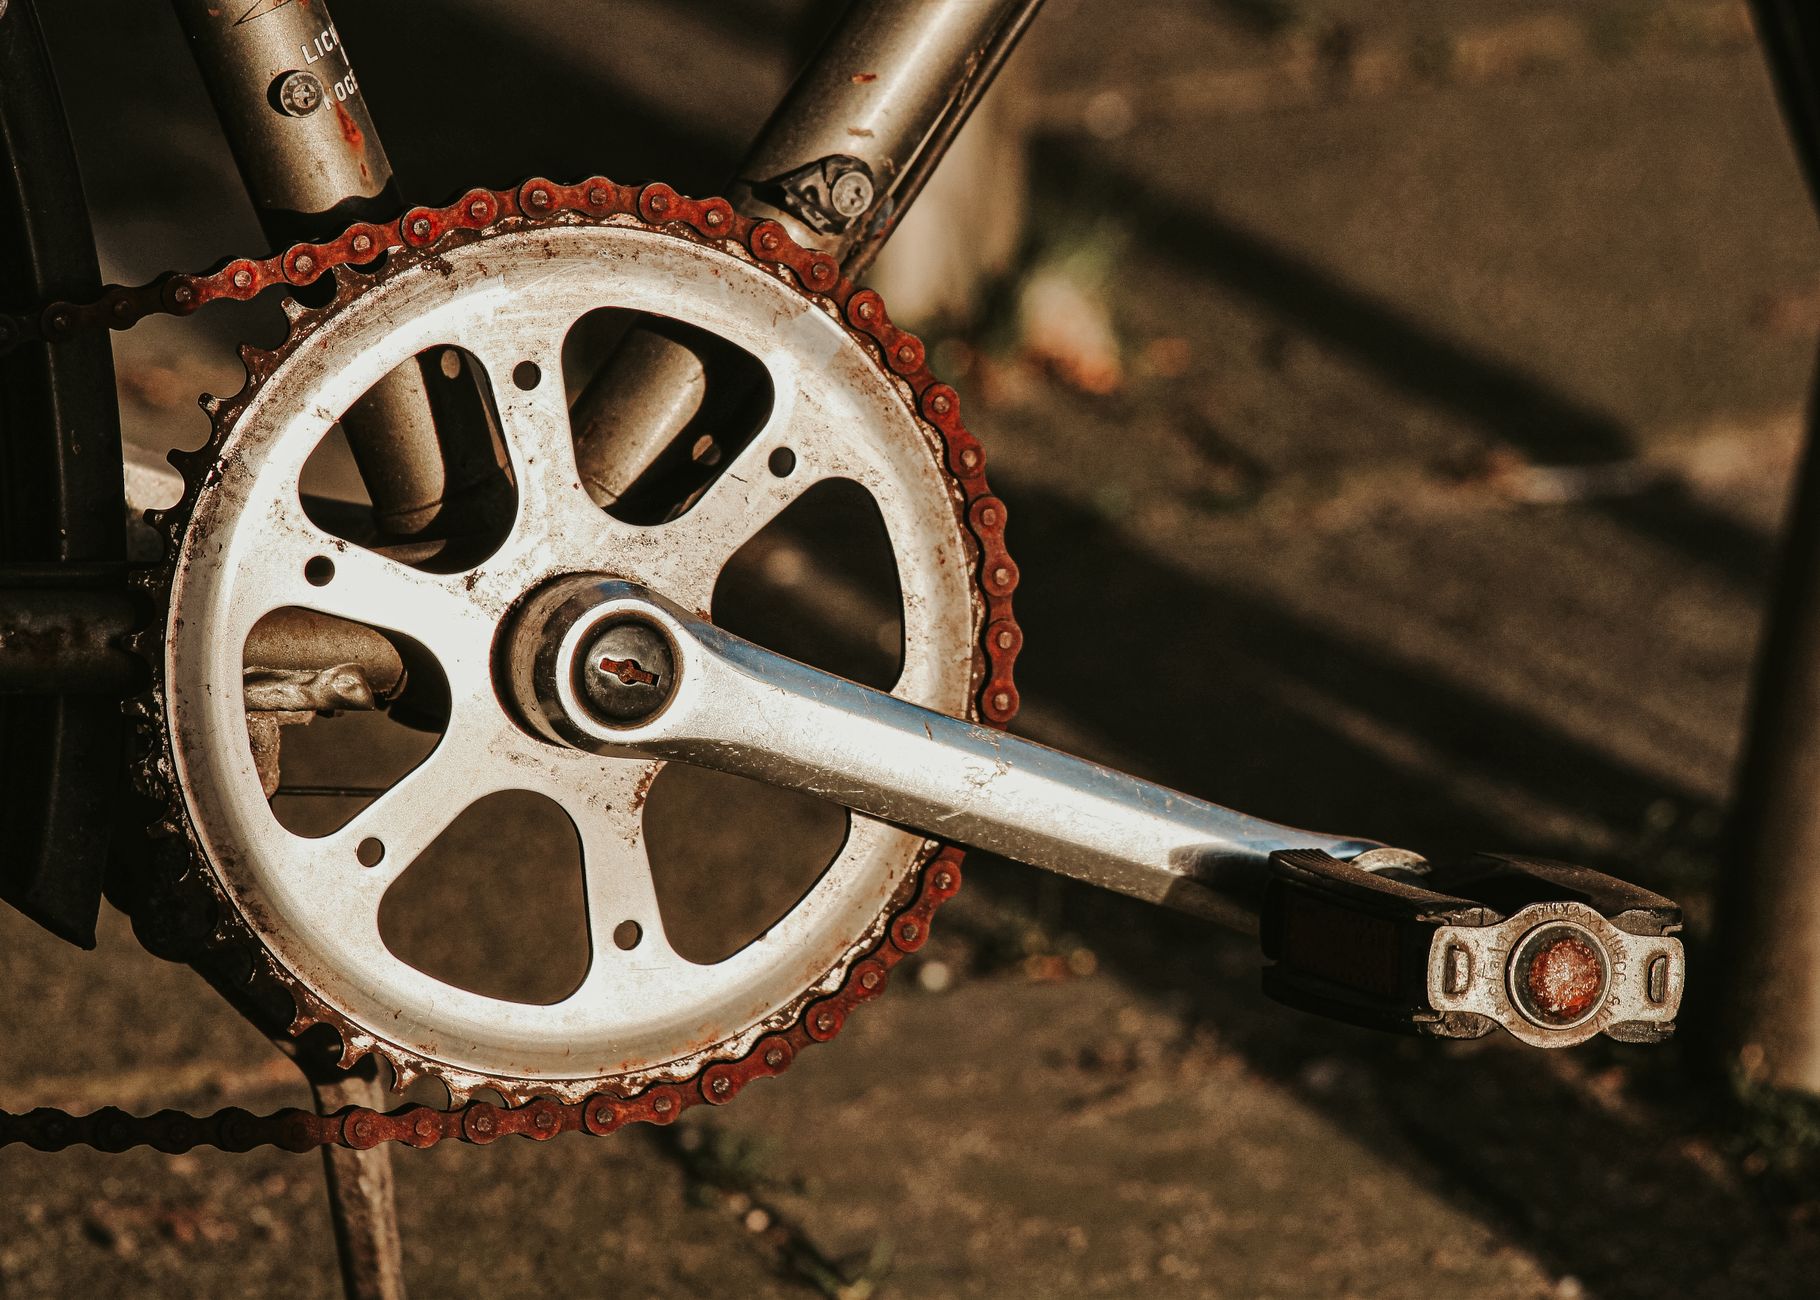
The chain is the single most neglected — and most expensive-to-replace — part of a mountain bike drivetrain. Skip cleaning and lubing it for a season, and you don't just wear out a $35 chain. You also chew through your cassette ($60–$300), your chainring ($40–$150), and eventually your derailleur pulleys. A $35 part becomes a $400 problem in about 1,500 miles of neglect.
The good news: chain maintenance is one of the easiest, cheapest skills a mountain biker can learn. Twenty minutes a month and a $25 toolkit will keep your drivetrain shifting crisp for years. Here's everything you need to know about cleaning, lubing, and knowing exactly when to replace your MTB chain.
Why MTB Chains Wear Out Faster Than Road Chains
A mountain bike chain leads a much harder life than its road-going cousin. It eats dust, dirt, mud, sand, and occasional creek crossings, all while transmitting peak torque under load on steep climbs. Grit acts like sandpaper between the chain's inner pins and rollers, slowly stretching the chain link by link. As the chain elongates, the spaces between links no longer match the teeth on your cassette and chainring, accelerating wear on everything downstream.
This is why riders who ride dry dusty trails wear out chains roughly twice as fast as road cyclists logging the same mileage, and why wet/muddy PNW riders sometimes burn through chains in a single winter season.
How Often Should You Clean and Lube an MTB Chain?
There's no universal schedule — it depends entirely on riding conditions. Use this as your baseline:
- Dry, dusty trails: Quick wipe-down and re-lube every 2–3 rides; full clean every 100–150 miles.
- Mixed conditions: Re-lube weekly if riding 2–3 times per week; full clean once a month.
- Muddy or wet rides: Every single ride. Mud + water flushes lube out fast and accelerates rust overnight. Hose-down, dry, re-lube before the bike goes back on the rack.
- Bike-park / shuttle days: Re-lube before each day. Long descents combined with dust grind through a chain.
The squeak test is the lazy rider's friend: if your drivetrain makes any noise that isn't tire-on-dirt, your chain is dry and you've already accelerated wear.
The Right Way to Clean a Mountain Bike Chain
You have two options: clean the chain on the bike with a chain scrubber tool, or remove the chain entirely and soak it. For weekly maintenance, on-bike is fine. For an annual deep-clean (especially before switching lubes), removal is worth it.
On-Bike Method (10 minutes)
- Shift to the smallest cog and middle chainring so the chain is well-supported.
- Fill a chain scrubber (Park Tool CM-5.3, Pedro's Chain Pig, etc.) with a citrus-based degreaser. Avoid harsh solvents like gasoline or carb cleaner — they strip protective coatings and dry the rollers.
- Clip it on, backpedal slowly for 30–45 seconds, then dump and refill with clean degreaser for a second pass.
- Rinse with a gentle hose stream (not a pressure washer — high-pressure water blasts grit into sealed bearings).
- Wipe the chain dry with a rag. Then wipe each side of the chainring teeth, cassette cogs, and derailleur pulleys.
- Let the chain air-dry for 15–20 minutes before lubing. Wet lube on a wet chain just washes off.
Off-Bike Deep Clean (30 minutes)
Pop the master link with a master-link pliers, drop the chain in a sealed bottle of degreaser, shake for 60 seconds, repeat with fresh degreaser, rinse, and dry thoroughly before reinstalling. This is what you do once a year — or any time you're switching to a wax-based lube (more on that below).
Chain Lube: Wet vs. Dry vs. Wax
Pick one lube and stick with it. Mixing types builds gummy residue that's worse than no lube at all.
- Dry lube (wax-in-carrier formulas like Finish Line Dry or Rock N Roll Gold): Best for dusty, dry trails. Doesn't attract dirt. Needs reapplication every 50–100 miles or after any wet ride.
- Wet lube (Finish Line Wet, Maxima Chain Wax, Tri-Flow): Best for wet, muddy, and winter riding. Stays on the chain through hose-downs. Downside: it's sticky and attracts dust, so you'll need to clean more often.
- Hot wax / drip wax (Silca Super Secret, Smoove, Squirt): The longest-lasting and cleanest option — once applied correctly, drivetrain components stay nearly spotless and chain life improves dramatically. The catch: it only works on a factory-clean chain. You must strip the chain bare with multiple degreaser passes before the first wax application. Worth the effort if you ride a lot.
Whatever you pick: apply one drop per roller while slowly backpedaling. Then wipe off all the excess from the outside of the chain. Lube belongs inside the rollers and pins, not coating the outside collecting dirt.

The Chain Wear Indicator: Your Most Important Tool
A new MTB chain measures exactly 12 inches across 12 links (pin-to-pin). As the chain wears, those internal spaces stretch. The industry standard is the chain-checker tool — a cheap go/no-go gauge ($10–$15) with two markings:
- 0.5% wear: Chain is still serviceable, but it's time to start watching closely.
- 0.75% wear: Replace the chain immediately. At this point, the chain alone is worn but your cassette and chainring are likely still salvageable. Replace just the chain and keep riding.
- 1.0% wear: Too late. The cassette and chainring teeth have also worn to match the stretched chain. A new chain will skip under load. Now you're replacing the entire drivetrain ($150–$500+ depending on tier).
This is the difference between a $35 maintenance item and a $400 emergency. Check your chain every 200–300 miles with a chain-wear tool. Set a reminder. Don't rely on shifting performance — by the time the chain skips, the damage is done.

Installing a New Chain Correctly
When the wear gauge tells you it's time, replacement is straightforward:
- Buy the right speed chain. 11-speed cassette = 11-speed chain. 12-speed = 12-speed chain. They are not interchangeable; tolerances are different.
- Size it correctly. Lay the new chain next to the old chain on a flat surface and count the links. If you don't have the old chain, the standard technique is: route the chain around the largest chainring and largest cog (bypassing the derailleur), pull snug, then add two full links plus enough for the quick-link.
- Install the master link / quick-link with the directional arrow facing the direction of pedaling rotation on the top run of the chain.
- Snap the link closed by holding the brakes and pushing down on the pedal — that pop you feel is the link fully seating.
- Test shift through every gear before your first ride to confirm derailleur indexing is still dialed.
For deeper drivetrain work, our MTB suspension setup guide and tubeless conversion walkthrough are good follow-ups — clean drivetrain, dialed suspension, sealed tires, and proper tire pressure are the four pillars of a fast trail bike.
The 60-Second Post-Ride Habit That Saves Drivetrains
If you take only one thing from this guide, take this: wipe your chain with a dry rag after every dusty or wet ride. That's it. Backpedal slowly while squeezing the chain through a folded shop towel for one minute. You'll see the grit transfer to the rag instead of grinding inside your chain.
Riders who do this consistently get 2,500–3,500 miles out of an MTB chain. Riders who don't get 1,000–1,500. Same chain, same trails — completely different costs. Twenty minutes of maintenance a month is the difference between a drivetrain that lasts a season and one that lasts three. Your wallet (and your shifting) will thank you.