Spark plugs are one of the cheapest, easiest, and most rewarding parts you can swap in your own driveway. A fresh set restores smooth idle, sharper throttle response, and the fuel economy your engine had when it was new. Skip the dealer markup and the shop labor — with about an hour, a $40 set of plugs, and a torque wrench, almost anyone can knock this out.
Here's everything you need to know about when to replace spark plugs, which type to buy, the tools you'll need, and exactly how to change spark plugs DIY without damaging your engine.
When Should You Replace Spark Plugs?
The short answer: it depends on the plug material. Modern plugs last far longer than the copper plugs of the '90s, and using the wrong replacement interval is the #1 reason DIYers either waste money or run worn plugs too long.
- Copper (nickel) plugs — every 20,000 to 30,000 miles. Cheapest option, softest electrode. Common in older vehicles and some small engines.
- Platinum plugs — every 60,000 to 80,000 miles. Single platinum on the center electrode; double platinum adds it to the ground electrode for waste-spark systems.
- Iridium plugs — every 80,000 to 120,000 miles. Hardest metal, finest tip, best ignition. The default OEM choice on most modern engines.
- Ruthenium plugs — 100,000+ miles. Newer premium option; check your manufacturer's spec sheet.
Always defer to your owner's manual or the service interval in your factory service manual. Severe-duty driving (lots of short trips, towing, dusty environments, stop-and-go traffic) shortens those intervals by 20–30 percent.
Symptoms That Say "Change Me Now"
- Rough idle or noticeable misfire (sometimes with a flashing check engine light — that's a serious one; don't drive on it long)
- Drop in fuel economy of 5–10 percent or more
- Hard cold starts or extended cranking
- Sluggish acceleration or hesitation under load
- OBD-II codes in the P0300–P0312 range (random or cylinder-specific misfires)
How to Find the Correct Spark Plug for Your Vehicle

This is where most parts-counter mistakes happen. The wrong heat range, reach, or thread pitch can cause pre-ignition, fouling, or — worst case — pistons hitting the electrode.
Use one of these three methods, in order of reliability:
- Owner's manual or factory service manual. Lists the OE part number and the gap spec. Most accurate.
- Pull a plug and read the markings. The part number is etched on the ceramic insulator. Cross-reference it on NGK, Denso, Champion, or Autolite's website.
- Online lookup tools. RockAuto, NGK's "Spark Plug Finder," and Denso's catalog all let you punch in your year/make/model/engine and return validated OE-equivalent options.
If you're upgrading from copper to iridium, that's fine — just match the heat range and gap. Never downgrade from a finer-tip iridium back to a thick copper electrode unless your manual specifically allows it; modern ignition systems are tuned for the finer plug.
A Note on Gap
Most modern iridium and platinum plugs are pre-gapped at the factory to a tolerance tighter than you can match by hand. Check with a wire-type gap gauge anyway. If it's within ±0.003" of spec, leave it alone. Adjusting an iridium plug's fine tip can break the electrode — only adjust if it's clearly out of spec, and never pry on the electrode itself.
Tools You'll Need

- Spark plug socket with rubber insert or magnet (5/8" or 13/16" depending on plug size) — the rubber holds the porcelain so you don't drop the plug back into the well
- 3/8" drive ratchet plus a 6" and 10" extension to reach deep wells
- Torque wrench (3/8" drive, 5–25 ft-lb range) — non-negotiable for aluminum heads
- Wire-type or coin-type gap gauge
- Dielectric grease for coil boots
- Anti-seize compound (only if your plug manufacturer says yes — more on this below)
- Compressed air to blow debris out of the spark plug wells before removal
- Clean shop rags and a flashlight
That last one — compressed air — is a tip most DIY guides skip. Spark plug wells collect dirt, leaves, and small debris. If any of that falls into the cylinder when you pull the plug, you've just guaranteed yourself an engine problem. Hit each well with a quick blast of air before the plug comes out. A 50 ft hose lets you reach every corner of the bay without dragging the compressor around.

Step-by-Step: How to Change Spark Plugs

Work on a cold engine — at least three hours after the last drive. Hot aluminum threads are soft and tear easily.
- Disconnect the battery. Negative terminal first. Prevents accidental coil firing and electronic gremlins.
- Remove anything in your way. Engine cover, intake tubing, sometimes the upper intake manifold on V-engines. Take photos before disassembly — future-you will thank you.
- Unbolt the coil pack (or pull the plug wire if you have one). Single 10mm bolt on most coils. Wiggle the boot side-to-side as you pull; don't yank straight up by the wire.
- Blow out the well with compressed air. Wear safety glasses.
- Break the plug loose with a 6" extension and ratchet. They'll be tight. Once it's free, switch to hand-turning until it's out.
- Inspect the old plug. Light tan/brown deposits = normal. Black sooty = running rich. Oily = oil leak past valve seals or piston rings. White/blistered = lean condition or wrong heat range.
- Compare the new plug to the old one. Same length, same thread, same gap, same electrode design. If anything looks off, stop and re-verify the part number.
- Hand-thread the new plug using the rubber insert in your spark plug socket. Always start by hand to avoid cross-threading aluminum heads — this is how engines get destroyed.
- Torque to spec (see next section). No guesswork. No "just snug it up."
- Dab dielectric grease on the inside of the coil boot, then reinstall the coil and its bolt.
- Repeat for each cylinder, one at a time — never pull all the coils at once. Keeps the firing order foolproof.
- Reassemble, reconnect the battery, and start the engine. Idle should be smoother almost immediately. A brief OBD-II relearn drive (10–15 minutes of mixed driving) lets the ECU adapt.
Spark Plug Torque Specs: Don't Skip This
This is where DIY jobs go sideways. Over-torque and you'll strip aluminum threads or crack the plug ceramic. Under-torque and the plug can back out, blow combustion gases into the well, or fail to make a proper seal.
Match torque to your head material and plug size:
- Aluminum head, 14mm plug with gasket seat: 18–22 ft-lb
- Aluminum head, 14mm plug with tapered seat: 7–15 ft-lb
- Cast iron head, 14mm plug with gasket seat: 25–30 ft-lb
- Cast iron head, 14mm plug with tapered seat: 10–15 ft-lb
- 12mm plug, aluminum: 10–18 ft-lb
- 10mm plug (small engines, motorcycles): 7–10 ft-lb
Your owner's manual or the plug manufacturer's spec sheet trumps the chart above — always check first. If the manual lists a range, target the middle.
Use a click-type torque wrench in the 5–25 ft-lb range for most car plugs. A 1/2" drive wrench rated 30–150 ft-lb is too coarse for plug torque and will over-tighten. If you only own one wrench, get the small one for plugs and reserve the big one for lug nuts and suspension work.
Anti-Seize and Dielectric Grease: When to Use Each
This is the most-debated detail in spark plug DIY, so here's the straight answer.
Anti-Seize on the Threads
Modern plugs come pre-treated with a nickel or zinc-chromate coating on the threads. NGK and Denso both say no anti-seize on plated plugs — adding it acts as a lubricant, throws off your torque reading by 15–20 percent, and can lead to over-torque and stripped threads. Champion and a few aftermarket brands still recommend a thin coat. The rule:
- Plug is plated/coated (most modern OE plugs): no anti-seize
- Plug is plain steel or you're installing into a head with known seizing issues (older Ford Triton 5.4L, for example): thin coat above the second thread, never on the bottom threads near the electrode
- When in doubt, follow the plug manufacturer's instruction sheet
Dielectric Grease on the Coil Boot
This one is universal: always use it. A dab of dielectric grease inside the rubber coil boot does two jobs — it keeps moisture out and prevents the boot from sticking to the plug porcelain on the next service. Don't pack it; a pea-sized smear is plenty.
Common DIY Mistakes to Avoid
- Working on a hot engine. Wait at least three hours. Aluminum threads are unforgiving when warm.
- Cross-threading the new plug. Always start by hand. If it doesn't spin in smoothly for three turns, back out and try again.
- Skipping the torque wrench. "Tight enough" isn't a spec. Buy a $50 wrench; you'll use it for years.
- Forgetting to gap iridium plugs. Don't adjust them unless they're clearly out, but always check.
- Pulling all coils at once. Do one cylinder at a time so firing order stays bulletproof.
- Letting dirt fall into the cylinder. Compressed air, every well, every time.
The Payoff
A spark plug job is maybe 60–90 minutes of driveway work on a typical 4- or 6-cylinder engine. Parts run $25–$60 for a full set of quality iridiums. Compared to the $200–$400 a shop will charge, this is one of the highest-value maintenance jobs you can take on yourself — and it scratches the "I fixed it" itch in a way that pulling a fuse doesn't.
Pick the right plugs for your engine, take your time with the tools, and torque every plug to spec. You'll feel the difference on the first drive — and the next 80,000 miles after that.
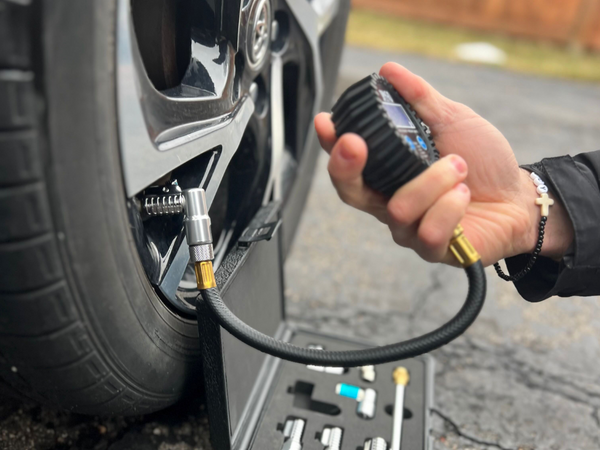
Want more DIY-friendly garage guides? Browse the full JACO product line for the tools that make jobs like this faster and cleaner — from air hoses and quick-connect fittings to pressure gauges and inflators that belong in every home shop.