Your motorcycle has exactly two contact patches with the road, and each one is roughly the size of a credit card. That's it. Everything you ask of your bike — acceleration, braking, cornering, stability at highway speed — gets transmitted through those two small patches of rubber. Neglect them, and you're gambling with the only thing keeping you upright.
The good news: motorcycle tire care isn't complicated. A few minutes of attention every month catches almost every problem before it becomes dangerous. Here's exactly what every rider should check, how often, and why it matters.
Why Monthly Tire Checks Matter More on Two Wheels
On a car, a soft or worn tire is a nuisance. On a motorcycle, it's a safety emergency. With only two wheels and no margin for a slide, tire condition directly controls whether you stay on the bike. Underinflation causes vague, heavy steering and overheating. Overinflation shrinks your contact patch and makes the ride harsh and skittish. Worn tread loses grip in the wet and lengthens stopping distances.
Motorcycle tires also lose air faster than most riders expect — roughly 1–2 PSI per month under normal conditions, and more as temperatures swing. Add the fact that many bikes sit for days or weeks between rides, and a "fine last week" tire can be meaningfully low by the time you swing a leg over it. A monthly check is the single highest-value habit a rider can build.
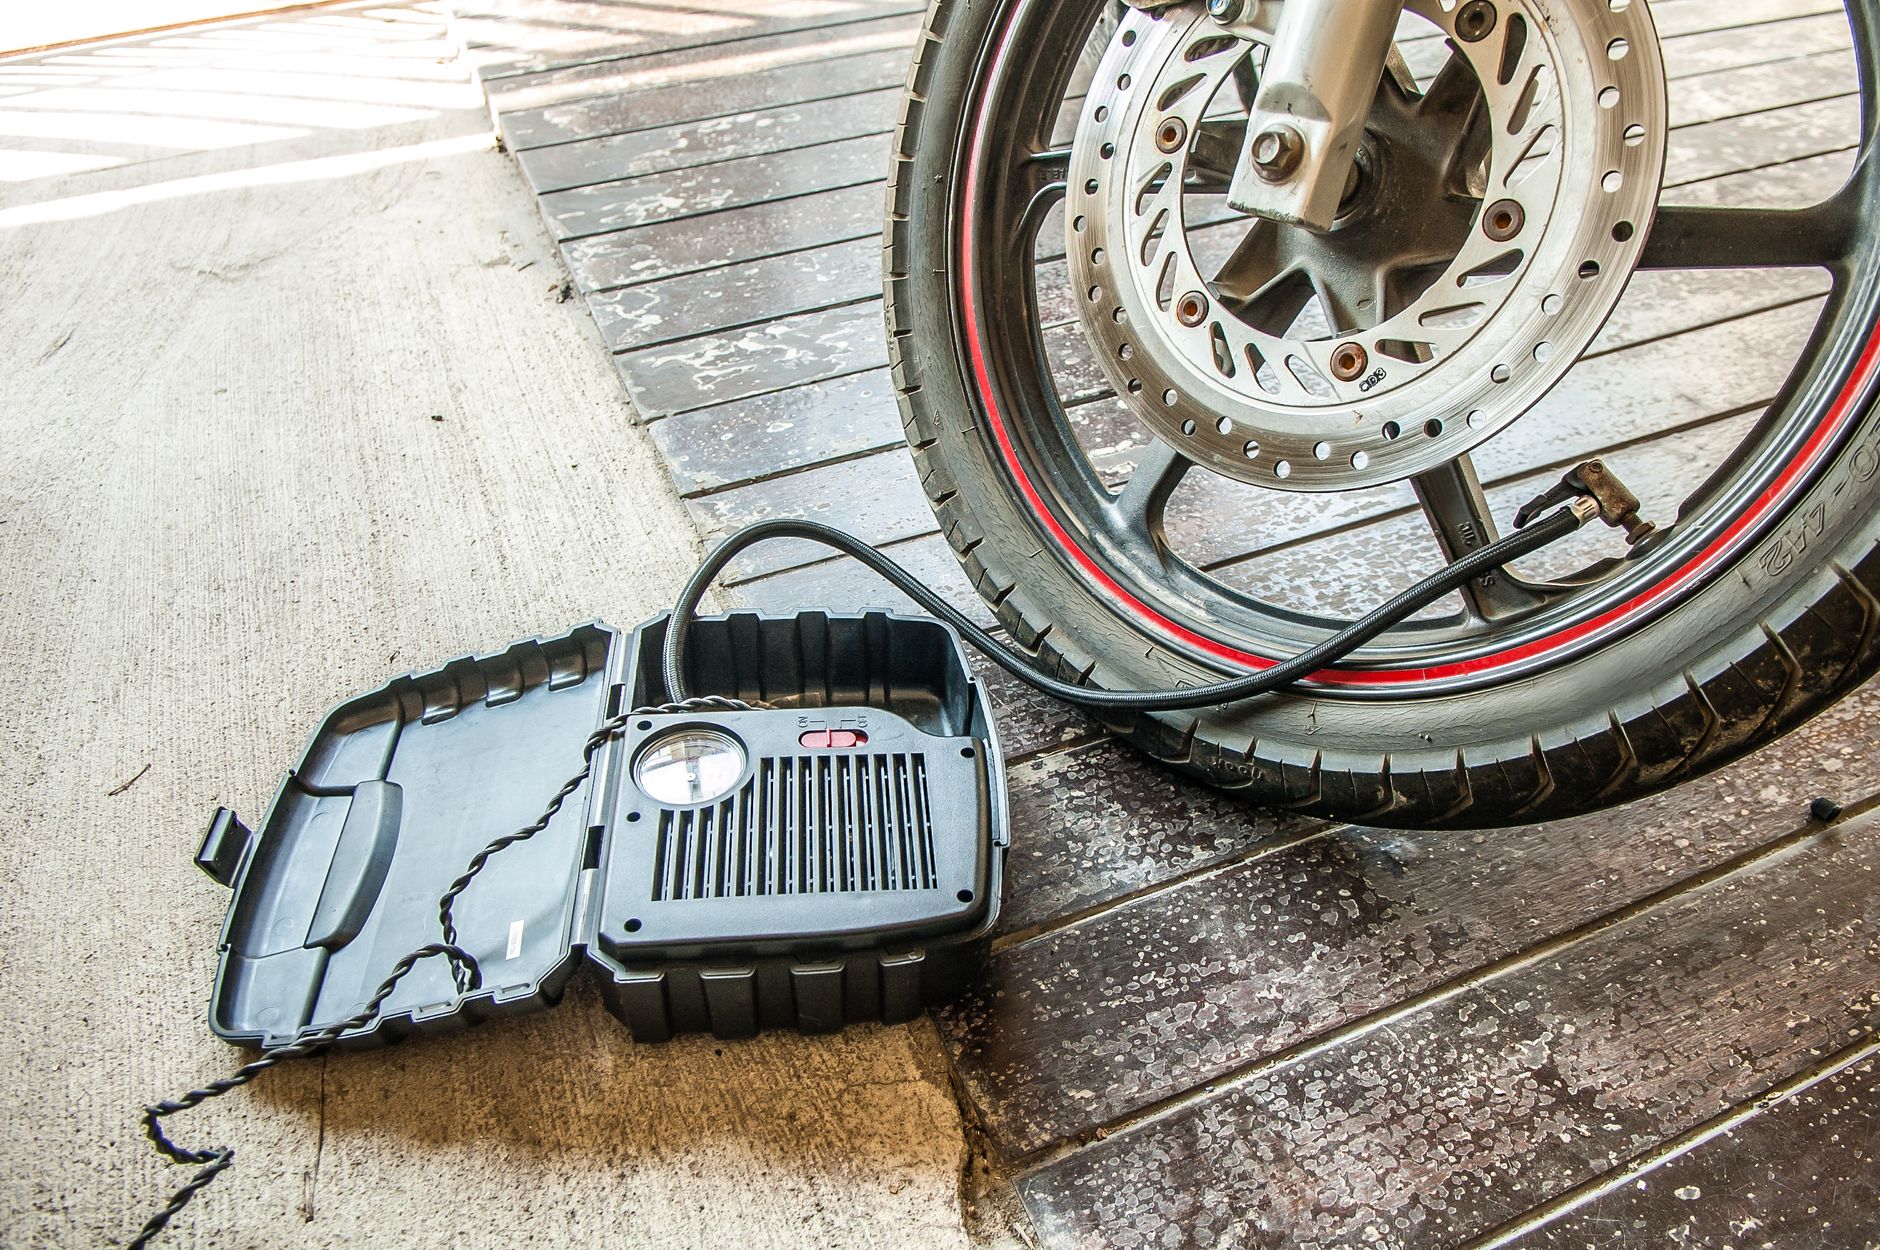
1. Check Tire Pressure (Cold, Every Time)
Tire pressure is the foundation of everything. Always check it cold — before you ride, or at least three hours after — because rolling heat can add 4–6 PSI and give you a falsely high reading.
Find your correct pressures on the chain guard sticker, the swingarm, or in the owner's manual — not the number molded into the tire sidewall, which is the maximum, not the recommended setting. Front and rear are usually different, and a passenger or loaded saddlebags may call for higher rear pressure.
The gas-station gauge on a chained-up hose is the wrong tool for a job this precise. A quality digital gauge reads to a tenth of a PSI and won't bleed air every time you check. Motorcycle valve stems are often tucked behind brake discs and spokes, so an angled or flexible chuck makes the job far easier.

For a deeper dive on cold-versus-hot readings, our guide on how cold weather affects tire pressure applies to motorcycles just as much as cars.
2. Inspect Tread Depth and Wear Patterns
Look for the tread wear indicators — small raised bars set into the grooves. When the tread is flush with those bars, the tire is legally and practically done. Most regions set the limit around 1/32" (0.8 mm), but motorcycle tires lose meaningful wet grip well before that.
Wear patterns tell a story, too:
- Cupping or scalloping: uneven dips around the tire, often from worn suspension or chronic underinflation.
- A flat strip down the center: lots of straight-line highway miles — common on touring bikes.
- Worn edges, fresh center: aggressive cornering, or pressure set too low.
Run your hand across the tread (engine off, bike cool) to feel for high and low spots a quick glance can miss. Anything irregular is worth investigating before your next long ride.
3. Look for Damage, Cracks, and Embedded Objects
Walk around the bike and inspect the full circumference of both tires. You're hunting for nails, screws, or glass embedded in the tread; cuts or bulges in the sidewall; and dry-rot cracking between the tread blocks. A bulge means the internal structure has failed — that tire is unsafe at any speed and needs replacing now, not next month.
Pay special attention if your bike sits a lot. Sunlight and ozone harden rubber over time, producing fine cracks that compromise grip even on a tire with plenty of tread left.
4. Mind the Age of Your Tires
Tread depth isn't the whole story — rubber ages out even if you barely ride. Find the DOT date code on the sidewall: the last four digits show the week and year of manufacture (for example, "1823" means the 18th week of 2023). Most manufacturers recommend replacing motorcycle tires at five to six years regardless of tread, and never running a tire older than ten.
An old tire can look perfect and still have hardened, glazed rubber that simply won't grip when you need it. If you bought a used bike or a closeout tire, check that code before you trust it.
5. Keep an Inflator Handy — at Home and on the Road
Finding a tire 5 PSI low does you no good if you can't correct it. A reliable inflator with an accurate built-in gauge lets you top off in the garage and carry the means to fix a slow leak miles from anywhere. For shop and garage use, a digital inflator that locks onto the valve and shuts off at your target pressure takes the guesswork out of the job.

6. Don't Forget the Valve Stems and Wheels
A perfect tire on a leaking valve still goes flat. Check that valve caps are present (they keep grit and moisture out of the core) and that stems aren't cracked or weeping. Give each cap a snug hand-tightening. While you're down there, glance at the rim for dents or bent spokes, which can break a bead seal and cause slow, mysterious pressure loss.
If you keep losing a couple of PSI a week with no visible puncture, a tired valve core is a common and cheap culprit — worth swapping before you chase phantom leaks.
7. Match Pressure to How You Ride
The factory numbers are your baseline, but load and riding style matter. Two-up with luggage on a long highway run? Run the rear at the higher, loaded spec in your manual. Track day or spirited canyon carving? Some riders drop a couple of PSI for a bigger contact patch once the tires are warm — but only within the manufacturer's safe range, and always reset to street pressures afterward.
When in doubt, stick to the placard. Guessing pressures by feel is how riders end up with vague handling or a chunked tire.
Your Monthly Motorcycle Tire Checklist

Pull it all together and the routine takes five minutes:
- Check cold pressure, front and rear, against the placard spec.
- Scan tread depth and look for uneven wear.
- Inspect the full circumference for cuts, nails, bulges, and cracks.
- Confirm the tires aren't aged out via the DOT date code.
- Check valve caps, cores, and rims for leaks or damage.
- Top off pressure as needed and adjust for load.
That handful of minutes is the cheapest insurance in motorcycling. Tires are the difference between confident cornering and a low-side you never saw coming — treat them like the safety-critical equipment they are. Keep an accurate gauge in your tail bag, an inflator in the garage, and make the monthly check a habit. Your two contact patches will return the favor every mile.
Want more rider-ready maintenance tips? Browse the full lineup of JACO tire pressure gauges and inflators built for accuracy you can stake a ride on.